Before I embark on the narrative of this chapter, I want you to join me in a small experiment. The result will play a role in the story that follows.
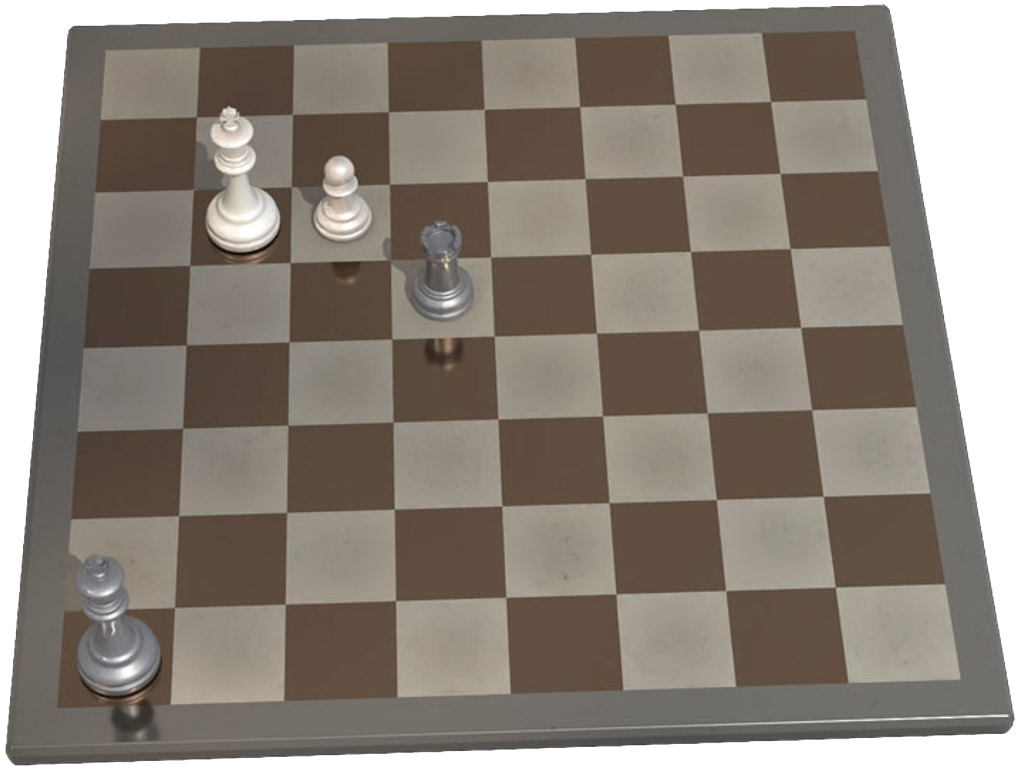
Please take a look at the above position – it is White (moving up the board) to play and win. Chances are you already know the study, but if you don't, please don't scroll down. Try to solve the problem in your mind, by just looking at the 3D-board above.
You will probably instantly see that White must start with 1.c7, since any king move allows 1...Rc5, after which the pawn is lost. The question is how you can progress after 1.c7 Rd6+? White clearly cannot play 2.Kb7. If he does, then Black will play 2...Rd7, pinning the pawn and capturing it on the next move. So how does White proceed?
Now I want your brain to leap into action: by just looking at the board above, can you figure out a clear path to victory for White? You have to work out a strategy that is six moves long (and ends with a wonderful subtly). The question is: can you see all the intricacies – including why only one very specific line works – by just looking at the board? Or follow the solution, which I will now give?
Your mental thought process must be as follows: 2.Ka7 is just as bad as 2.Kb7. Black simply pins the c7 pawn and captures it on the next move. So White must clearly move the king downwards. 2.Ka5?? is insane: Black actually wins, after 2...Rc6 and 3...Rxc7.
White can try 2.Kc5, but maybe you saw the defence: 2...Rd1 (or ...Rd2 or ...Rd3). If the pawn promotes Black can skewer the king with 2...Rc1+ (or c2 or c3).
So White must play 2.Kb5! Black continues with 2...Rd5+, and now once again White cannot move to the c-file because of ...Rd1, ...Rc1+ and ...Rxc7. So White continues 3.Kb4 Rd4+ 4.Kb3 Rd3+ 5.Kc2. Looking good: 5...Rd1 and ...Rc1+ is no longer impossible.
But here comes a black defence that most people, solving in their heads, will miss. A number of chess engines miss it as well, in the look-ahead in the initial position. The defence is 5...Rd4! Now if 5.c8Q then 5...Rc4+, and when the queen captures the rook it is stalemate!
So what can White do? 5.c8R!! (threatening immediate 6.Ra8 and mate). 5...Ra4, and now White plays 6.Kb3, attacking the rook and threatening 6.Rc1#. Black is lost.
Were you able to follow the entire solution in your head? If you have trouble doing it, try moving the pieces on our live diagram board:
Click on the fan button below the board to switch on a chess engine. It will analyse with you and help you find the solution. Note that the + and – buttons to the right of the engine window that appears display more or less lines, while the "!" button tells you what a move is threatening. Of course, you might want to first try and solve the study on your own, or without switching on the engine. Maybe even in your head?!
I dictated the position shown in the first diagram to about a dozen candidates. All amateurs didn't have a chance of solving it in their minds. The mid-teens with full GM titles who did not know the position, struggled for a while, but worked out all the complexities, with a little prompting from me, in an average of ten minutes. A majority, however, knew the study (GM Leon Mendonca: "Fred, I have known it since I was five!").
One interesting candidate was Tykhon Cherniaiev. On an adventure playground I called the 12 year old Ukrainian talent and started dictating the position: "So there is a black king on a1, a white king on b6, white pawn on c7..." Before I could finish the lad exclaimed: "Yes, I know it: White plays c7, the rook..." (which I had not yet mentioned) "...checks, the king goes to c2 and then underpromotes!" This kid must have thousands of studies in his mind.
And another interesting candidate: John Nunn. When I dictated the study to him he was a bit taken aback. Was I serious? Instead of giving me the solution, he started telling me the historical background of the study.
In 1875 there was a game between Richard Fenton and William Potter. It ended in a draw, but Johannes Zukertort showed how Fenton could have won. In 1895 G.E. Barbier published a study he derived from the Fenton–Potter game. He claimed that with wKb6, Pc7; bKa1, Rd5; Black to play could draw (1...Rd6+ 2.Kb5 Rd5+ 3.Kb4 Rd4+ 4.Kb3 Rd3+ 5.Kc2 Rd4! 6.c8=Q Rc4+ 7.Qxc4 stalemate – as in the study above).
But then a Spanish priest. Fernando Saavedra, who lived in Glasgow, pointed out that White could win with the underpromotion given above. That single move made Saavedra, who was not a strong player, one of the best-known figures in chess. Mention his name to any chess enthusiasts, and chances are that they will know who he is. More likely than Zukertort or Kieseritzky.
So how was John able to extemporize this explanation. Well, it turns out he is the proud owner of a chess book solely devoted to this subject: No Rook Unturned – A Tour Around the Saavedra Study, written in 2004 by Harrie Grondijs. It is 361 pages long and entirely devoted to the Saavedra position and the personalities connected to it.
The first edition consisted of 30 copies, and John bought number 15 (with an autograph of the author). There was a later second edition, also of 30 copies. About this book John says: "It's beautifully produced and full of meticulous research."
And here is the full solution to the Platov study. Note that you can click on the moves of the notation to get a replay on the side, where you can follow the lines given.